
Swapping saddles
“I’m not totally comfortable. I’m going to try another saddle.” Sounds simple, right?
Wrong!
Recently, I’ve gone through this process with a few of my 1:1 athletes and realised that sometimes my words don’t explain the specifics nearly as well as pictures can.
When swapping saddles, it’s not as simple as mounting the new one in a similar position on the saddle rails. The focus needs to be on where you actually sit on the saddle.
I’ve attached two pictures below. These show all the saddles I’ve ridden on my TT bike (albeit only briefly for this purpose), with the point where my sit bones made stable contact marked on each one.
Picture 1: Saddles with the rails lined up evenly.
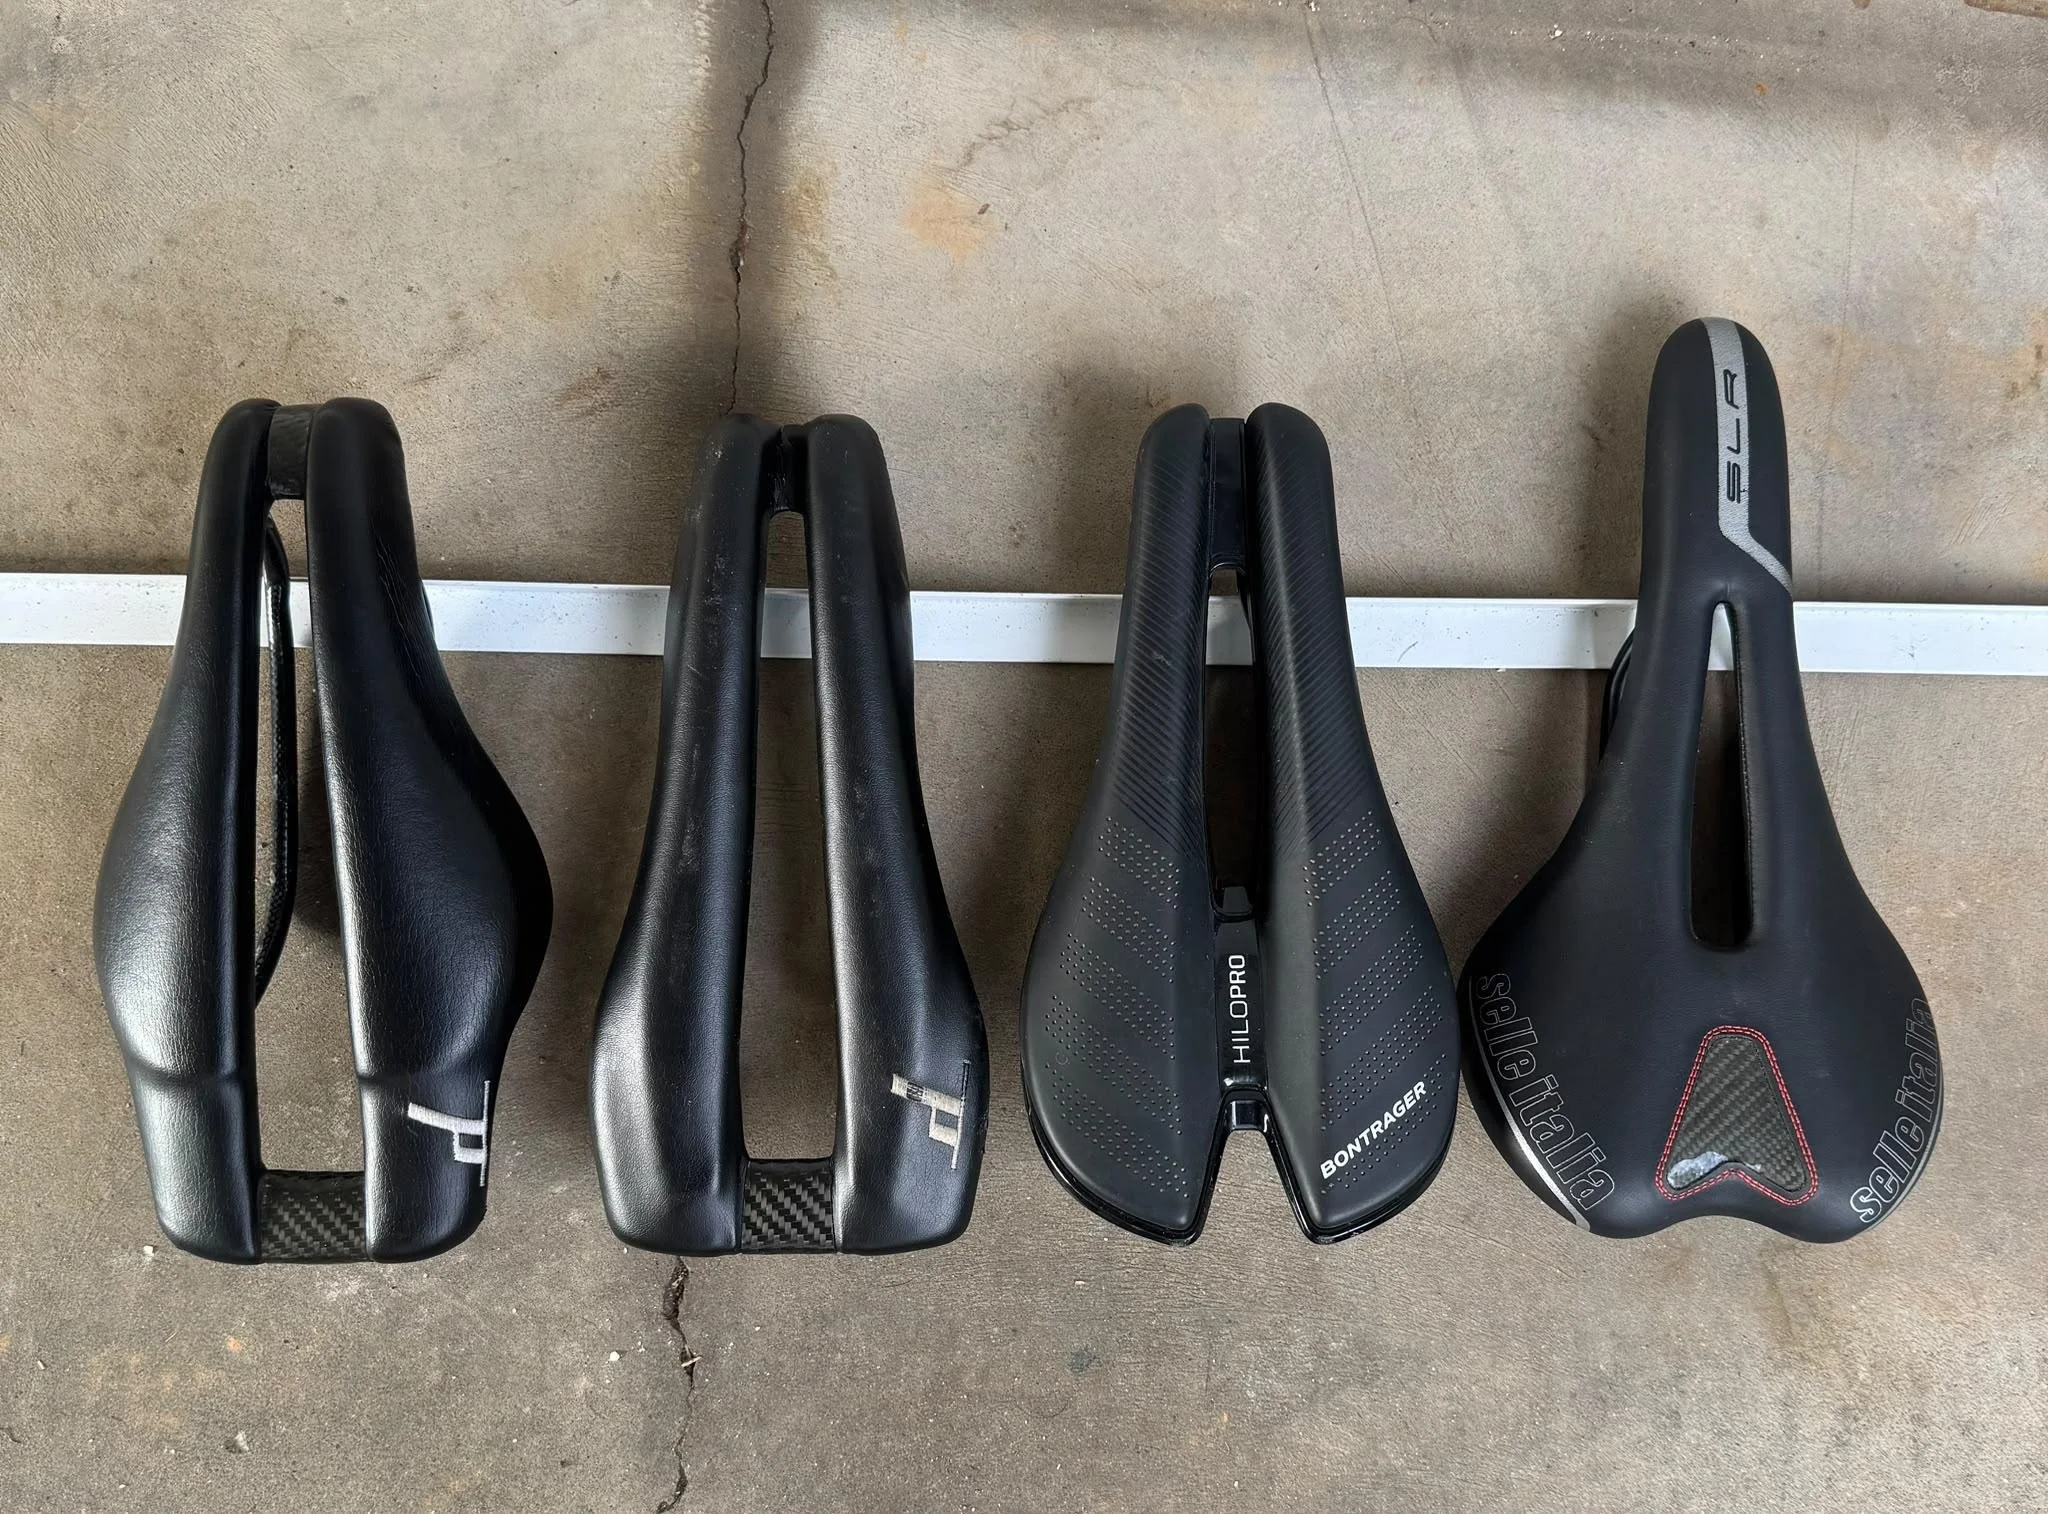
Picture 2: Saddles aligned based on the sit bone contact point, showing how differently they need to be mounted on the seatpost to achieve the same effective seat tube angle.
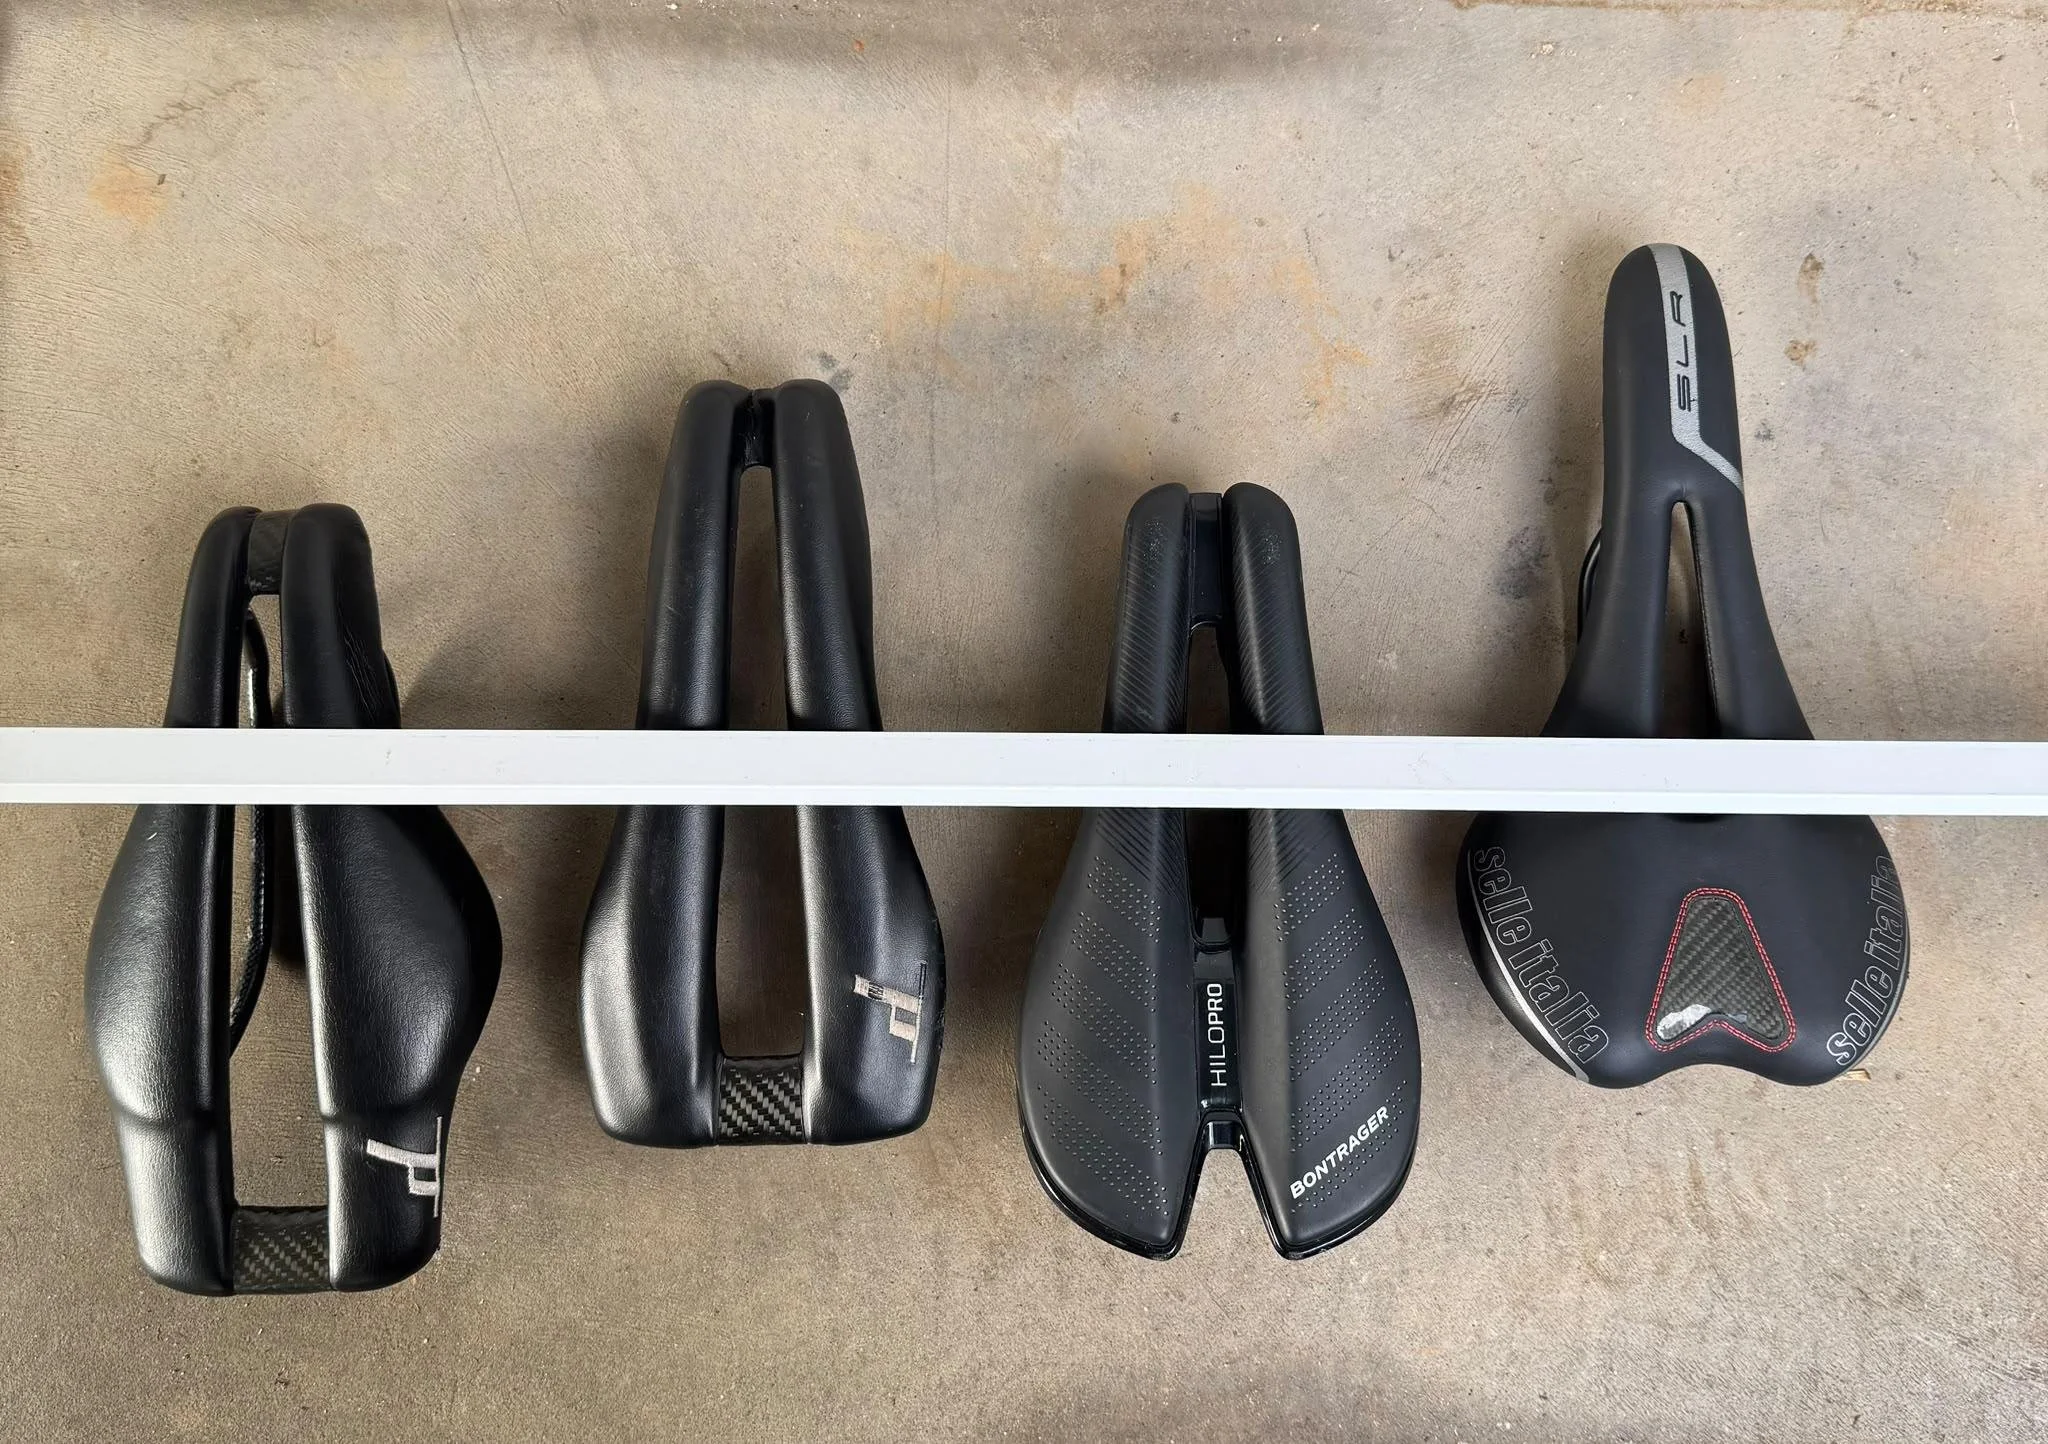
The aim of these pictures is to show that changing saddles isn’t always a simple swap. It’s a process that can take multiple rides—and time—to refine before you find the right position.